I recently picked up crochet. I didn’t need a new hobby, but I was looking for something more portable than sewing for binge-watching shows and going on vacation.
For my first project, I used a Baggu reusable shopping bag as a project, which worked great because the yarn pulled out with ease as the skein slid on the nylon. Halfway through, I knew I wanted to make a better bag. I wanted it to have enough structure to stand independently, handles for easy travel, and a non-zipper closure to keep the contents inside without snagging the yarn.
Sewing a Crochet Project Bag
The Firefly Bag by Noodlehead came up while searching for knitting bag patterns. I’m not new to bag making, so the “made entirely of rectangles” description solidified that I wanted to find a free pattern or draft one, probably something like a bag pattern I prototyped almost a decade ago.
Fortunately, this fabulous crochet or knitting project bag tutorial met all the criteria. I made some minor modifications and ended up with this made-in-an-evening bag!

I used 100% stash for this project. 🎉 The exterior is Ottertex Waterproof canvas (in orchid), and the interior is satiny Pima cotton I’d picked up from Joann years ago. I used some of my coveted Carrie Bloomstone quilting cotton as pocket accents.
I love how the drawstring holds stuff snug in the pouch and how that top can fold over the body of the bag for easy access to the interior while stitching.

I made a few minor modifications to the free pattern to make it work better for me.
1. Skipped the fusible foam
I knew the flex foam on hand wouldn’t fuse well with the bag’s 100% polyester canvas body with a polyvinyl chloride (PVC) waterproof backing. The canvas weighs 390 GSM (11.50 oz/yd²), making it a fairly sturdy material. I expected that would help the bag stand on its own, and for the most part, it does.

2. Eliminated the bottom seam

I didn’t want a bottom seam because the dense seam from the waterproof canvas might make it tricky for the bad to sit flat. I combined the bag bottom pieces into one (1) 12” tall x 16” wide piece while keeping the size of the original two (2) 10″ x 16″ body panels and the two (2) 14″ x 16″ lining panels.
3. Exterior Pockets and Accent Straps

The 1″ cotton strapping in my stash was bulky, so I had to use it sewn in a single layer. Attaching the steps at the seam where the bag bottom met the bag body made a perfect opportunity to add exterior pockets.
The pockets were made from 14″ tall x 7″ wide rectangles interfaced with Pellon® 809 Décor-Bond®. The rectangles were folded in half, basted to the center bottom of the bag body pieces, and the cotton strapping overlapped the sides before the bottom was sewn on. I added the last “handmade” tag I had on hand from Emmaline Bags before folding the front pocket so the hardware was sandwiched in between the pocket layers.
The strapping was edge stitched and across about 1/4″ above where the pocket ended. This helped prevent the straps from interfering with the final step of finishing the top edge of the bag.
4. Interior Pockets

My interior pockets were 5.5″ and 6″ tall. In hindsight, I wish I’d put the croche hook slots on the 6″ side and maybe even make that side a little taller.
5. Keychain Strap
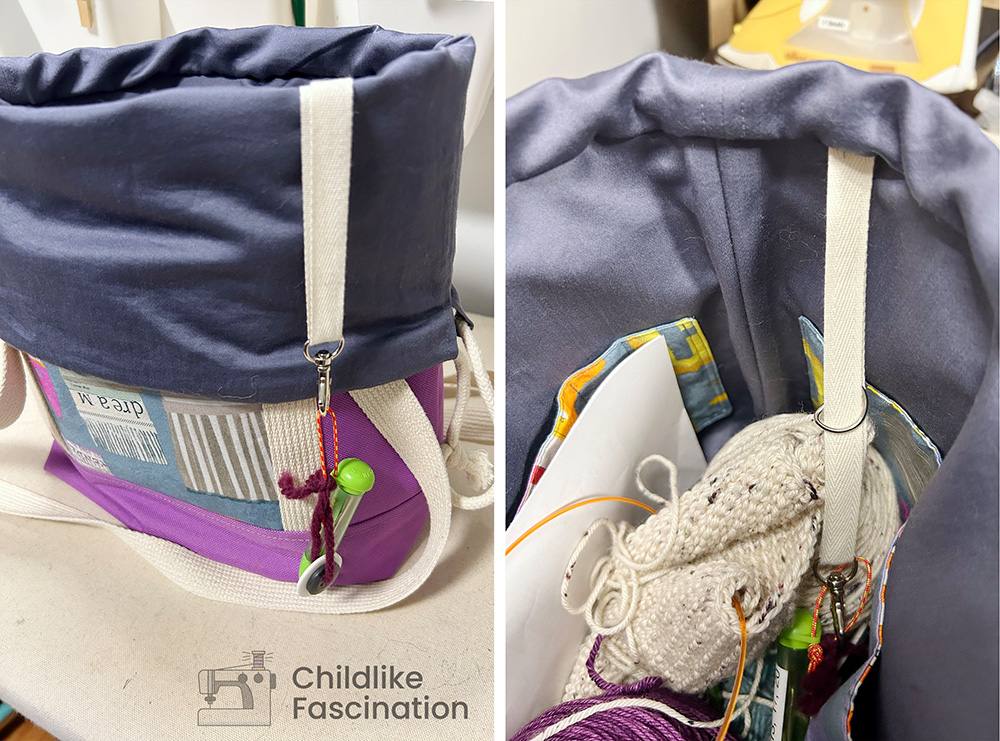
I like to add a keychain strap to any bag I make. I don’t always use it for keys, but it’s often beneficial to have a way to attach something securely to the inside of a bag.
Sewing a Pouch for Crochet Hooks

My first hook was a Prym size J. Once I knew I enjoyed crocheting other things and that the ergonomic hook suited me, I used some coupons and sales to pick up all the other Prym hook sizes. I figured a pencil case would fit the bill, but I didn’t want a flat zipper pouch. This YouTube video that results in a triangular prism pouch was perfect; it can sit flat while open, and nothing will roll out of it.
I was hopeful the size in the tutorial would fit the hooks, and it did! Rather than drawing on the interfacing to create a one-time-use template, I drafted the pattern described in the video into Illustrator. You can download the printable here.
Wide Open Pencil Pouch Printable (0 downloads )