I don’t usually send Christmas cards but this year was a little different.This year I wouldn’t be getting my favorite Christmas card, the reliable one from Gram. That really got me thinking about sending out cards so when I suddenly had the idea to sew fabric to the front of a card I knew I had to try. A short trip to Jo-Ann’s, a couple hours I had the absolute neatest DIY Christmas cards I’ve ever seen.

It didn’t make it in time for this Christmas but do Pin this post to your Christmas boards for next year!
Ingredients
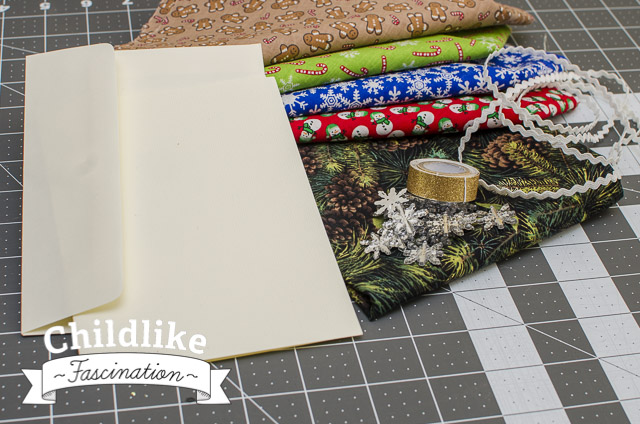
- 2 packs of A6 off-white cards (24 cards)
- 4 @ 1/8 yard cuts of fabric for gift boxes
- 1 @ 1/4 yard cut for pine trees
- Sparkle gold washi tape for the trunk
- 24 snowflake buttons or other embellishment for the star
- 1yd thin rick-rack (optional)
Tools
- Pinking shears
- Sewing machine
- Glue
I printed both a message inside my card as well as a little info on the back. Tutorial on that another day.

Because you might have different cards than I do (and so you can customize your design) trace the card onto a piece of paper
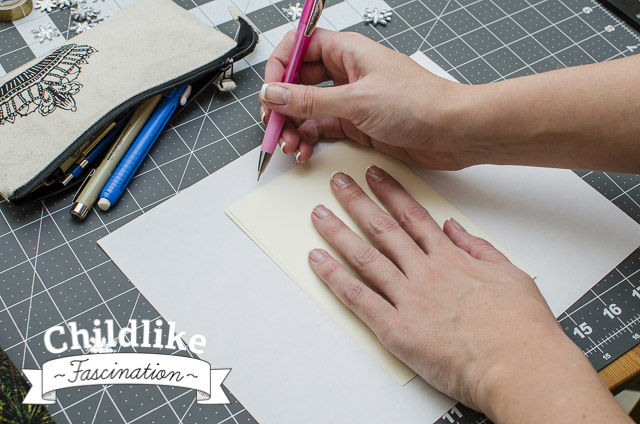
Sketch out your design. I used this so I had a way to measure approximate sizes to cut of my fabric.

Time to cut out your gifts! Use the pinking shears to trim off the cut edge then cut again the width of the fabric to a long strip.
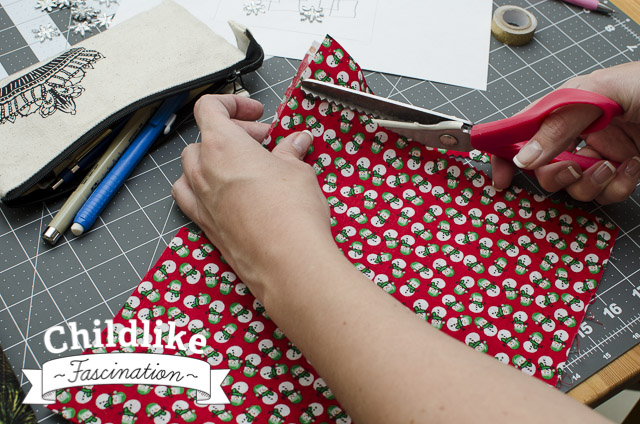
Sub cut strips into gift boxes, be sure to cut enough for each card you’re making!

I ball-parked the sizes for the gift but cut out the sketched triangle to use as a pattern for the tree body

Cut out enough trees for each card, you don’t have to make them exactly the same size, remember they’re each going to a different home!

Layout all the pieces on a card and do a excited dance in your kitchen cause it looks super neat.
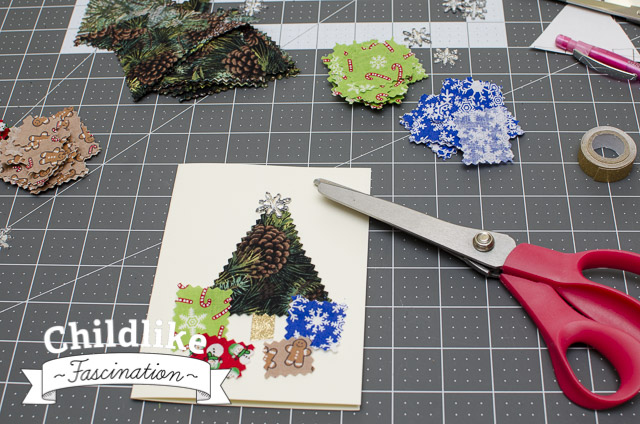
Tip: Take a photo of the layout with your camera so you can reference it later!
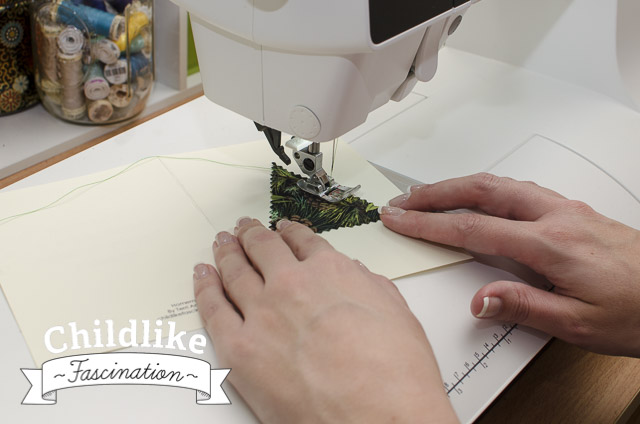
Open up the card (don’t want to sew it shut) and sew the tree trunk on. Doesn’t have to be placed perfectly – just eye ball it! Be sure to lock your stitches by back stitching at the beginning and end.

Cut ~1″ of the washi tape and tuck it under the seam allowance at the base of the tree.

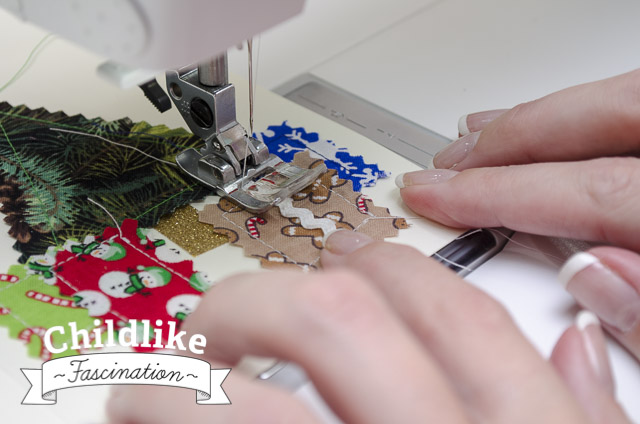
Now get to stitching on those presents. I decided to do 4 presents, multiple that by 24 and you’ll get 96 little boxes to sew!

I’d recommend sewing all the gift boxes “chain piece” style, all the blue one on the right side, then all the green ones on the left side etc.
You’ll see I switched thread for the first two pieces. I quickly gave up on that. I’d recommend a green for the trees then switch to white and go with that for all the remaining gift boxes.

Then all the red ones…it’s okay I regretted doing this many at this point but you’re too deep now: push through.

Fourth present: I’m now too lazy to neatly pile them behind the machine. Is this over yet? Thank goodness that I don’t have more than 24 cards to send!
I bought the rick-rack to do this. I did it on only 2 gift boxes this way cause someone was behind schedule and needed to get them in the mail! If you make your cards before December 15th you may have more time for embellishments.
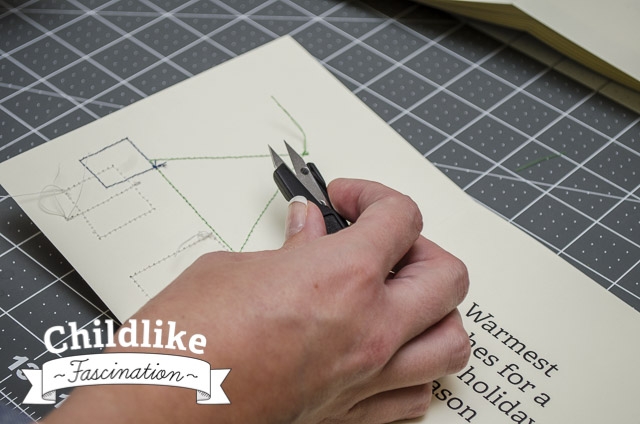
Trim up those threads! I this it’s super charming with the stitches in the back.
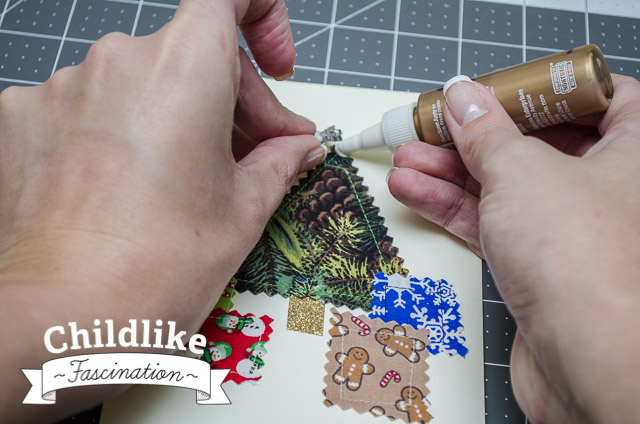
I started by stitching on the button and then promptly broke a needle and scared the jeepers out of myself. I decided I am not good at machine sewing buttons and glued them on.
Tada! I just think these are the neatest cards. I’m not one for paper crafting but I think this mixed-media Christmas card has a great handmade without looking too “homemade” which is why I had to share it with y’all. The pinking shears give it a rustic polished look and no matter how wonkey the shapes or stitches may look. No one will know where the imperfections are; they’re all going to different homes!
It didn’t make it in time for this Christmas but do Pin this post to your Christmas boards for next year!
Merry Christmas everyone!
Linking up with


Finish it up Friday
These cards are charming! You have managed to make something both fresh and classic.
These are really cute! I loved reading about how your neatness, and matching thread, etc., finesse details kind of went south in the mass production lol!
Thanks for the detailed tutorial. The recipients of your cards will truly be getting something special. Sorry to hear about your Gram.
These are really cute. Thanks for linking up to TGIFF this week!
Oh that’s such a cute idea!!